Introduction
I’m so excited to introduce Forms to everyone – this feature is a key part of most data apps I build. They can help speed up development and maintain apps over time. So let’s dig in and see how forms can help us simplify actions and data apps.
Need access to Sigma?
Note: You will only have view access to WOW Workbooks, Folders, and Workspaces, not edit access. Please create your WOW Workbooks under “My Documents.” We suggest creating a folder to organize all your workbooks.
Requirements
- Add Data to your Source Tab
- Workout Wednesday / 2026 / 2026W08 – Forms! / Countries of the World
- Add an Input Table on a new ‘Inputs’ tab
- In the table, add the following fields:
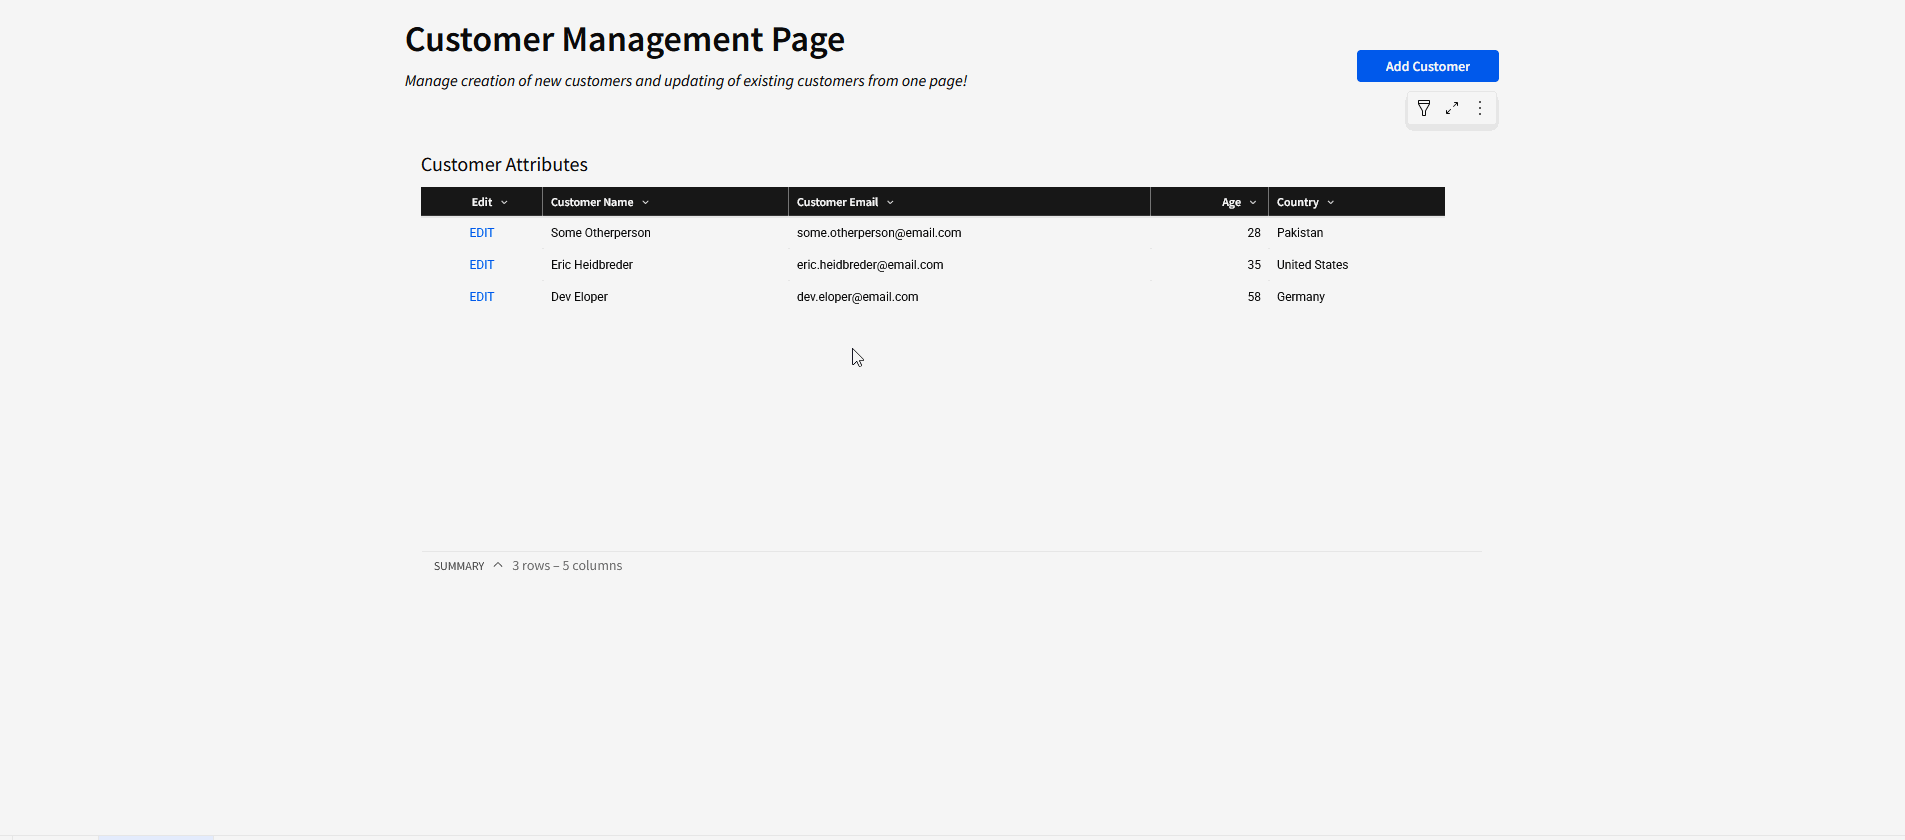
- Customer Name
- Customer Email
- Age (This should be a numeric column)
- Country
- Set up data validation and use the list of countries from the ‘Countries of the World’ table
- Add an ID field
- Click the plus sign to add a column, then select ‘Row ID’ near the bottom of the pop up
- In the table, add the following fields:
- Make a Control for your ID column (this is used to edit the input table later
- IMPORTANT, make the control a ‘List Values’ control, but uncheck the Allow Multiple Selections option
- Do not set any targets for this control
- Create your forms
- Select the input table, and select the ‘Create Child Element’ option. Then, select ‘Form’
- Name the form ‘Add Customer’ and confirm that it has all the fields from your input table
- Move your form to a new Modal Tab and update actions
- Create a new modal called ‘Add Customer’
- Move the ‘Add Customer’ form to that modal
- Nothing further needs to be done to ‘Add Customer’, you can remove the description and adjust the fields to your liking
- Duplicate the ‘Add Customer’ Modal
- Update the page name and form name to ‘Edit Customer’
- This is simply to copy over the formatting more easily
- Select the form on this ‘Edit Customer’ modal and go to actions
- Replace the ‘Insert Row’ action with an ‘Update Row’ action
- Use the row ID control you made earlier under the ‘Update by’ section. If you can’t see that option, it’s likely because the control has ‘Allow Multiple Selections’ enabled, go disable that!
- Under the columns section, select ‘Add all columns’ and set them all to update using the appropriate Form field
- Bringing it all together in a Presentation tab
- For people to use this, we need to give them some way to interface with the forms and tables
- Create a child table element from the input table (this is just to display the underlying data
- Add a new text column called ‘Edit’, the formula should be literally ‘EDIT’
- Center the text
- Change the text color to a blue, similar to hyperlink color
- Add a button near the top that says ‘Add Customer’
- Applying actions
- For the ‘Add Customer’ button, add an action that opens the ‘Add Customer’ modal
- For the ‘Edit’ column we created, go to actions
- On selecting the ‘Edit’ column, we want to perform the following steps
- Set the ‘ID For Form’ Control with the current row’s ID value
- Set Form Values in the ‘Edit Customer’ form
- Add all fields and use the ‘Column’ values
- Open ‘Edit Customer Modal’
- On selecting the ‘Edit’ column, we want to perform the following steps
Dataset
Workout Wednesday / 2026 / 2026W08 – Forms! / Countries of the World
Share
After you finish your workout, share on LinkedIn, Sigma’s Community page, (or Twitter) using the hashtags #WOW2025 and #SigmaComputing, and tag Ashley Bennett, Eric Heidbreder, Jessica Batten, and Carter Voekel!
Create an interactive, sharable version of your solution here.
Also, make sure to fill out the Submission Tracker so that we can count you as a participant this week to track our participation throughout the year.
Solution
Coming Soon!